Introduction
Systemd permet de lancer des actions en fonction du statut de sortie des services. Ceci permet par exemple de mettre en place une surveillance des services en déclenchant une notifications de réussite ou d’échec d’un service.
Pour cela, nous utiliserons :
- un service systemd dédié à l’envoi du statut (systemd-healthchecks),
- Healthchecks qui permet justement de centraliser les alertes d’exécutions de tâches,
- Gotify pour les notifications.
Création du service healthcheck
Créer le fichier .config/systemd/user/healthchecks-ping@.service avec le contenu suivant (GitHub) :
[Unit]
Description=Submit monitored EXIT_STATUS to healthchecks.io
Documentation=https://github.com/bbx0/systemd-healthchecks

# Usage:
# - Set ping key as service override: systemctl edit healthchecks-ping@.service
#   [Service]
#   Environment=HC_PING_KEY=<YourKey>
# - Create slug with same name as the monitored service in your healthchecks.io project
#   The prefix 'hc-' will be trimmed from the monitored service name and is not part of the slug.
# - Configure the monitored service unit to ping its result OnSuccess
#   [Unit]
#   OnSuccess=healthchecks-ping@%N.service
# - Optional: For explicit tests set the service unit execution result to success. (The test itself executed successfully.)
#   [Service]
#   SuccessExitStatus=0 1
# - Optional: Configure explicit transmition of failures (add suffix '-fail' to the instance name)
#   [Unit]
#   OnFailure=healthchecks-ping@%N-fail.service

[Service]
Type=oneshot
# Set via `systemctl edit healthchecks-ping@.service`
Environment=HC_PING_KEY=
Environment=HC_BASE_URL=https://hc-ping.com

# Slug is taken from the intance name of this service healthchecks-ping@<myslug>.service
# Example: healthchecks-ping@hc-diskspace-usage.service results in slug 'diskspace-usage'
# - A prefix 'hc-' is removed from the instance name (for easier use with dedicated healthcheck service units 'hc-%N')
# - A suffix '-fail' is removed from the instance name (to allow usage in OnFailure requiring a different instance name '%N-fail')
Environment=HC_SLUG=%i

# Skip submission if no ping key is configured
ExecCondition=test -n "${HC_PING_KEY}"

# Only systemd version 251 and above provide information about monitored services
# ($MONITOR_* values are not available in ExecCondition, so we test it in ExecStartPre)
# Check also if its a "start" invocation, where there will be obviously no $MONITOR_*
#ExecStartPre=test -n "${MONITOR_EXIT_STATUS}"
#ExecStartPre=test -n "${MONITOR_INVOCATION_ID}"
ExecStartPre=/bin/sh -c "[[ -n \"${MONITOR_EXIT_STATUS}\" || \"${HC_SLUG}\" =~ -start$ ]]"
ExecStartPre=/bin/sh -c "[[ -n \"${MONITOR_INVOCATION_ID}\" || \"${HC_SLUG}\" =~ -start$ ]]"

# Ping EXIT_STATUS of the monitored service to healthchecks.io
# (Disable variable substitution by systemd as this is executed within a shell with env var support by its own.)
ExecStart=:/bin/sh -c "\
slug=$(echo \"${HC_SLUG}\" | sed --expression='s/^hc-//' --expression='s/-fail$//' --expression='s/-start$//') || exit 2; \
data=$(journalctl _SYSTEMD_INVOCATION_ID=${MONITOR_INVOCATION_ID} --output=cat | head --bytes=100kB) || exit 2; \
status=$(if [[ \"${HC_SLUG}\" =~ -start$ ]]; then echo \"start\"; else echo \"{$MONITOR_EXIT_STATUS}\"; fi) || exit 2; \
curl --fail --silent --show-error --max-time 10 --retry 5 --output /dev/null --request POST --data-raw \"${data}\" --url \"${HC_BASE_URL}/${HC_PING_KEY}/${slug}/${status}\""
Éditer les variables du service :
systemctl --user edit healthchecks-ping@.service
Ajouter au début du fichier (voir section XX) :
[Service]
Environment=HC_PING_KEY=clé
Environment=HC_BASE_URL=https://healthchecks.h.gued.in/ping
Environment=HC_SLUG=ackbar-%i
Et recharger la liste des services :
systemctl --user daemon-reload
Ajout dans les services à surveiller
Pour déclencher le service healthcheck précédemment créé dans les services à surveiller, il suffit d’ajouter les directive OnSuccess & OnFailure (disponible à partir de la version 251 de systemd) à la section Unit du service :
OnSuccess=healthchecks-ping@%N.service
OnFailure=healthchecks-ping@%N-fail.service
Ainsi qu’une directive ExecPre sans la section Service afin d’executer le service healthcheck au démarrage. Cela permet de mesurer le temps d’execution du service surveillé.
ExecStartPre=systemctl --user start healthchecks-ping@%N-start.service
Par exemple pour Restic :
[Unit]
Description=Restic backup service
After=network-online.target
Wants=network-online.target
StartLimitIntervalSec=300
StartLimitBurst=5
OnSuccess=healthchecks-ping@%N.service
OnFailure=healthchecks-ping@%N-fail.service
[Service]
Type=oneshot
Restart=on-failure
RestartSec=30s
ExecStartPre=systemctl --user start healthchecks-ping@%N-start.service
ExecStart=restic backup --verbose --one-file-system --tag systemd.timer $BACKUP_EXCLUDES $BACKUP_PATHS
ExecStartPost=restic forget --verbose --tag systemd.timer --group-by "paths,tags" --keep-daily $RETENTION_DAYS --keep-weekly $RETENTION_WEEKS --keep-monthly $RETENTION_MONTHS --keep-yearly $RETENTION_YEARS
EnvironmentFile=%h/.config/restic/restic-backup.conf
Après modification, il faudra recharger la liste des services :
systemctl --user daemon-reload
Healthchecks
Installation de Healthchecks
Healthchecks sera installé au travers d’une stack Docker (avec Traefik en reverse proxy - voir les détails ici). Pensez à ajuster les variables :
---
version: "2.1"
services:
  healthchecks:
    image: lscr.io/linuxserver/healthchecks:latest
    container_name: healthchecks
    environment:
      - PUID=1000
      - PGID=1000
      - SITE_ROOT="https://healthchecks.h.gued.in"
      - SITE_NAME="Healthchecks"
      - DEFAULT_FROM_EMAIL=""
      - SUPERUSER_EMAIL=""
      - SUPERUSER_PASSWORD=
      - APPRISE_ENABLED=True
    volumes:
      - /opt/healthchecks:/config
    restart: unless-stopped
    labels:
      - traefik.enable=true
      - traefik.http.routers.healthchecks.rule=Host(`healthchecks.h.gued.in`)
      - traefik.http.routers.healthchecks.entrypoints=websecure
      - traefik.http.routers.healthchecks.tls=true
      - traefik.http.routers.healthchecks.tls.certresolver=default
    networks:
      - web
      - default
networks:
  web:
    external: true
Création du check
Ajouter le check dans Healthchecks :
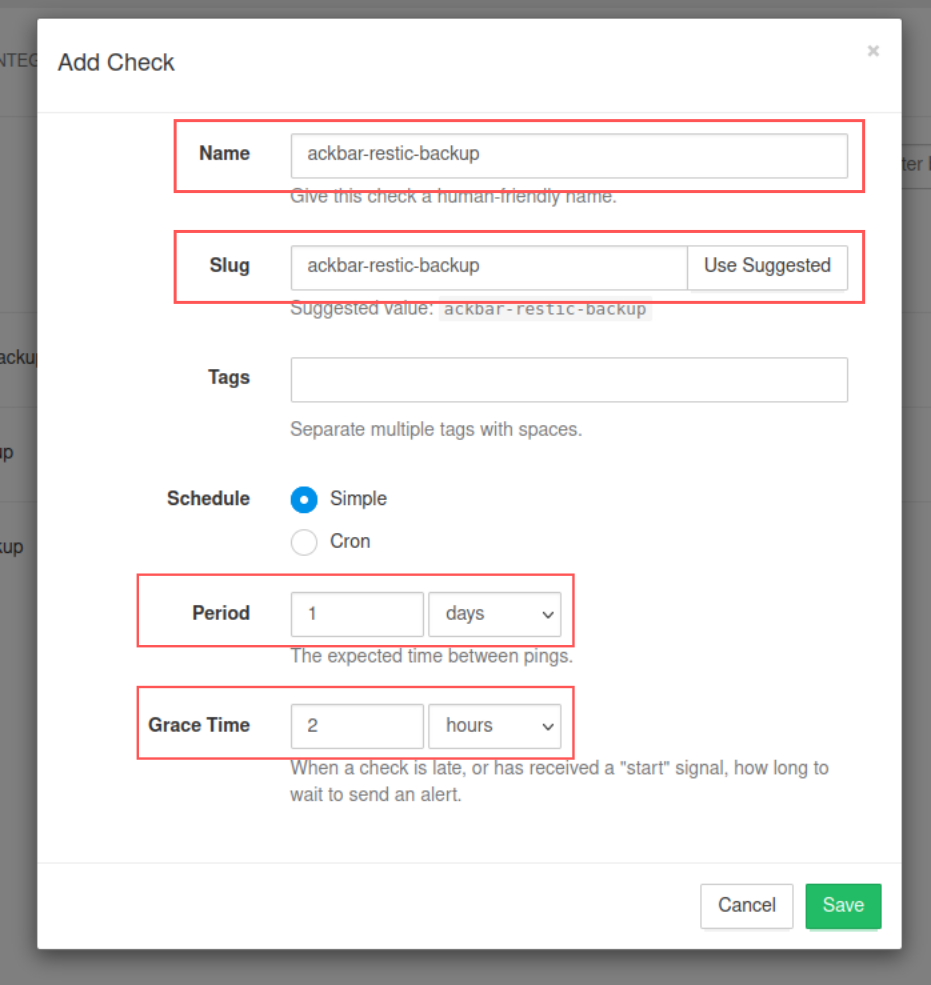
Renseigner à minima le Name et le Slug, et ajuster si nécessaire la Period et le Grace Time.
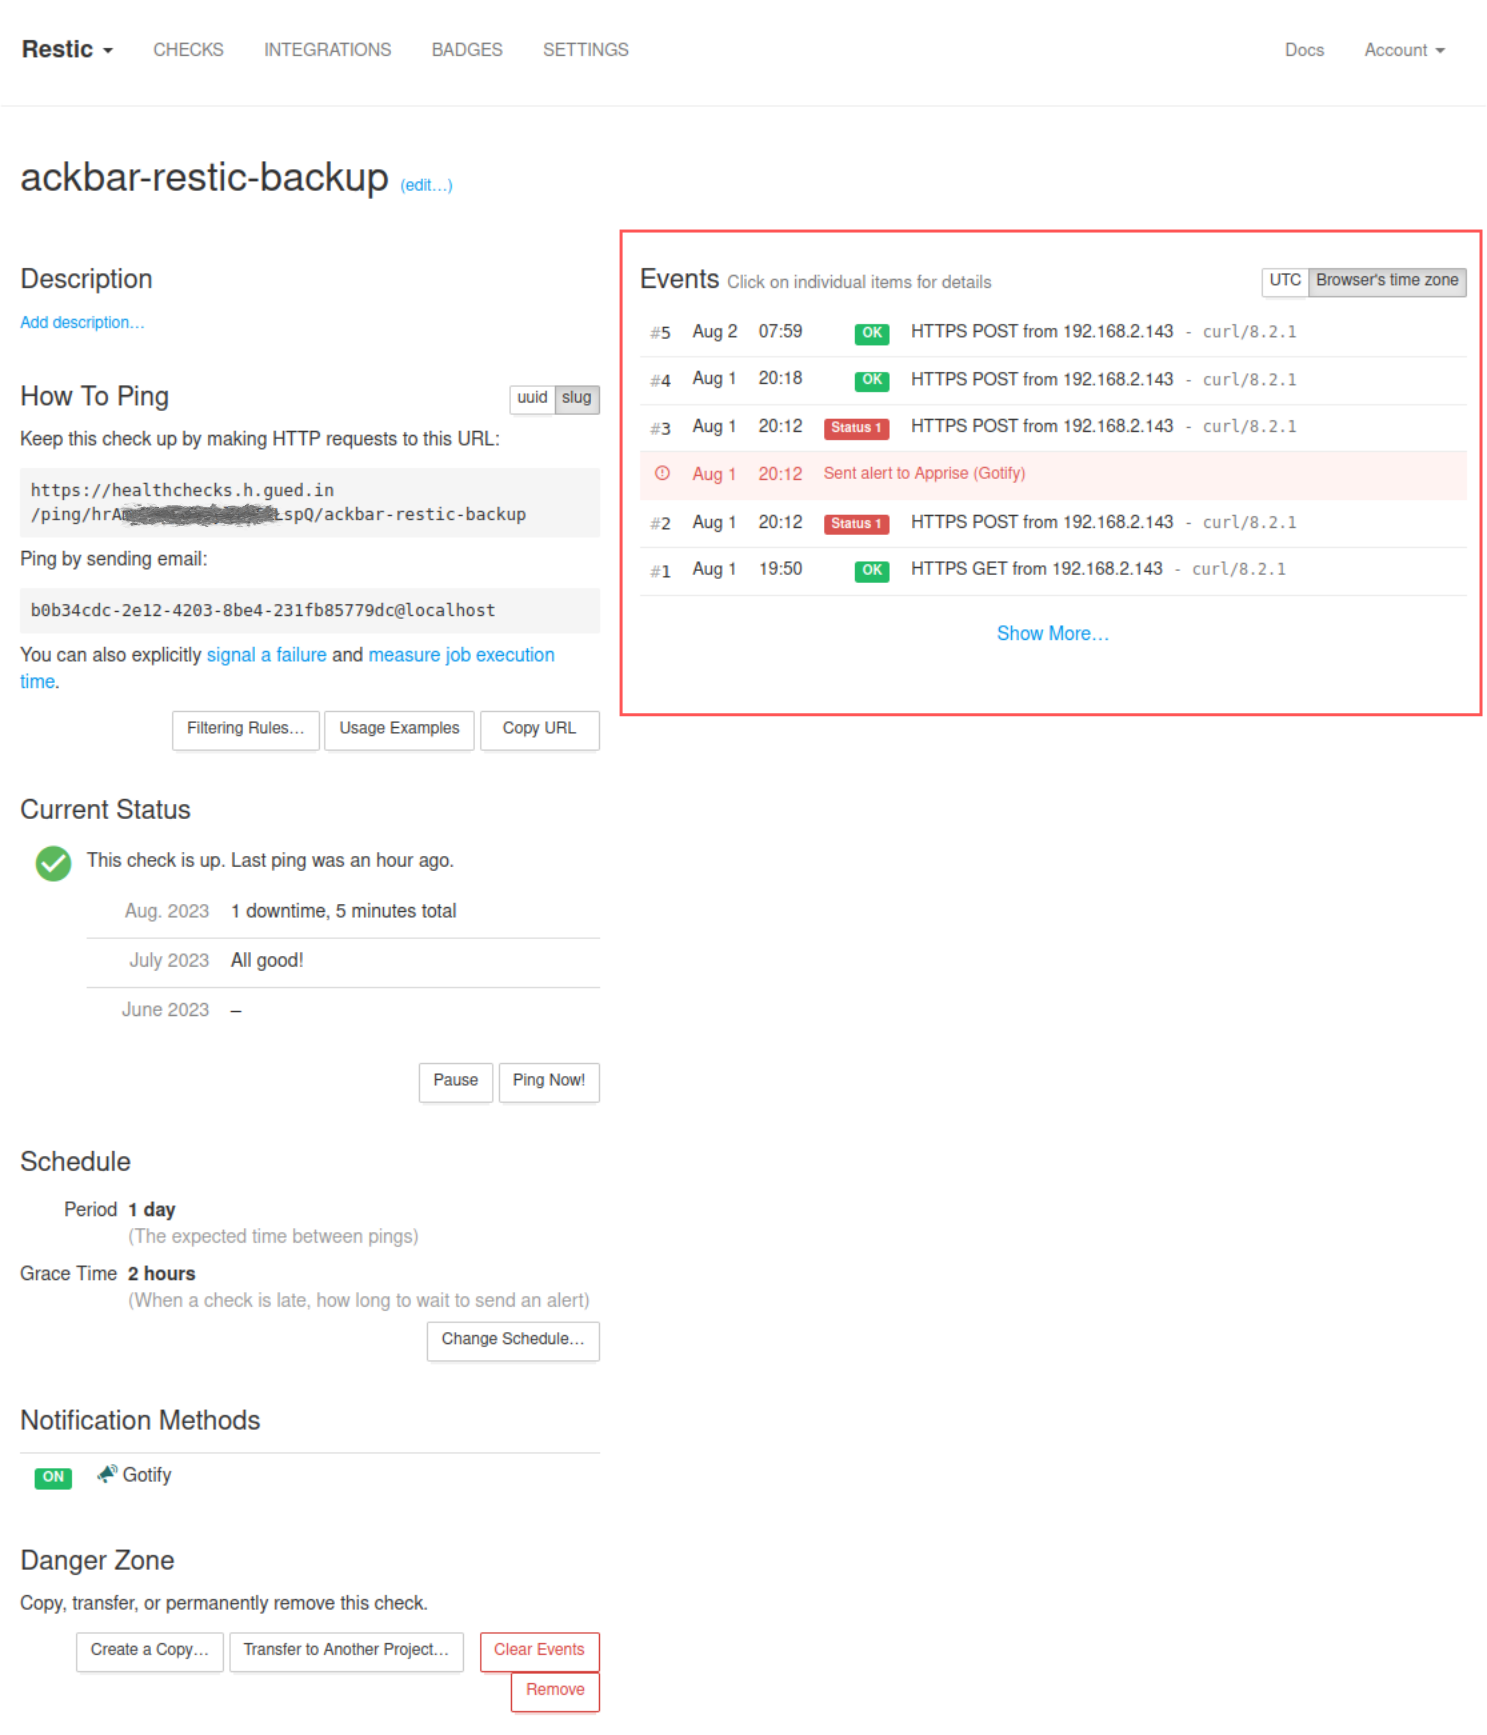
A la prochaine exécution du service, vous devriez retrouver des checks positifs ou négatifs dans l’interface du check nouvellement créé :
Notifications
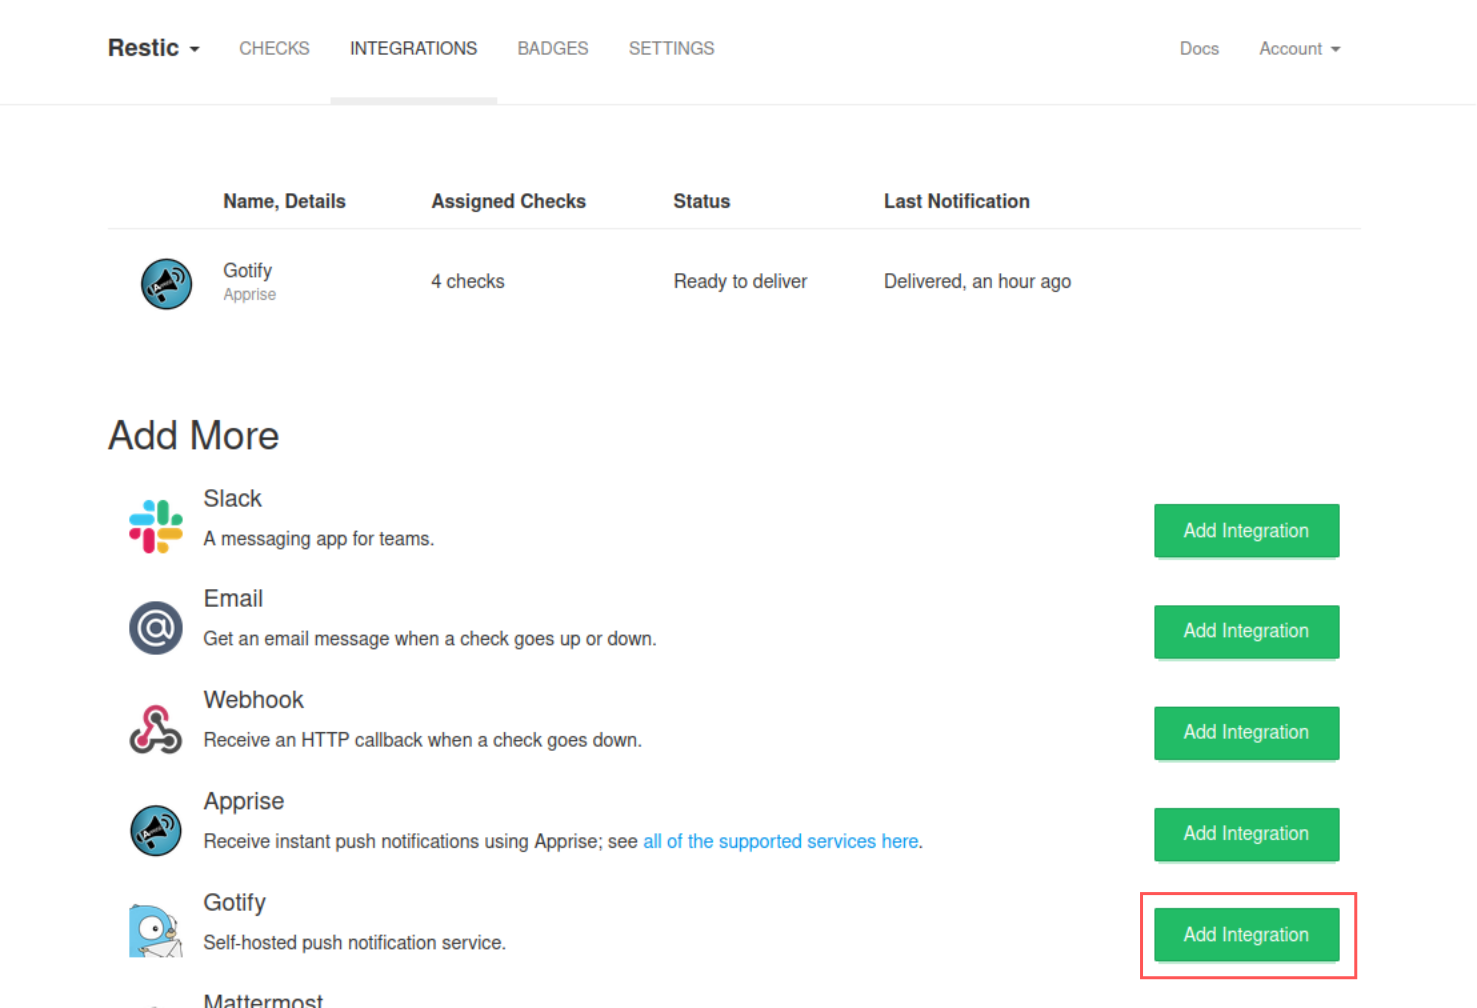
Healthchecks propose une intégration avec de nombreux services de notifications, dont Gotify.
Dans un premier temps, il sera nécessaire d’ajouter une Application dans Gotify :
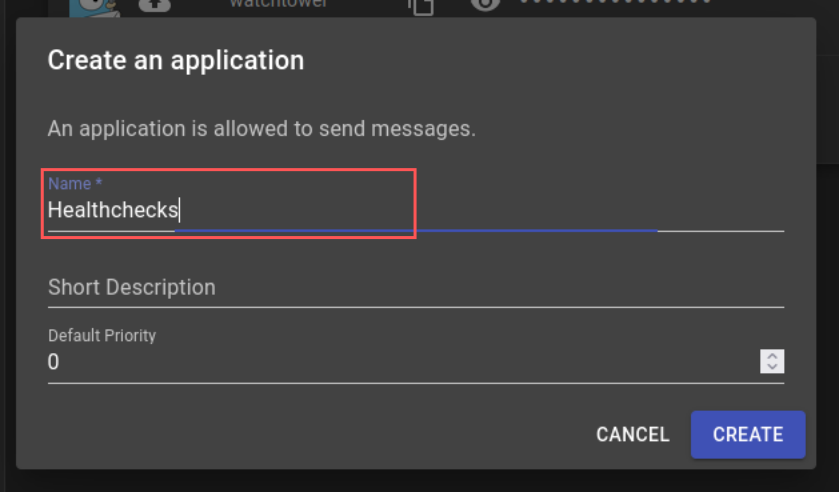
Renseigner le nom de l’Application, ici “Healthchecks”.
Une fois créé, il sera possible de récupérer son token depuis la liste des Applications :

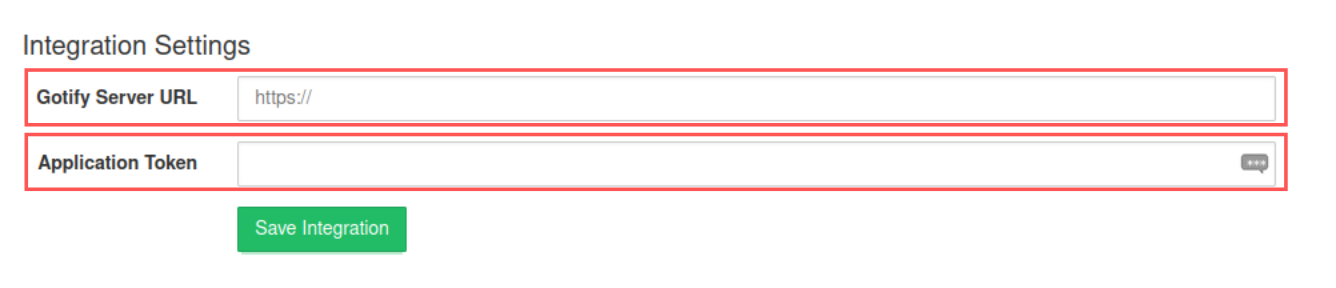
Puis retourner dans Healthchecks, et dans la section Integrations, ajouter une intégration Gotify :
Et renseigner l’adresse du serveur Gotify et le token de l’Application :